How to Transport Your LEGO Sets
Safe Packing & Moving Tips
9/17/202510 min read
Moving LEGO sets can feel tricky, especially when you want to keep every piece safe and organized. Whether you have a few small builds or a large collection, the right approach makes the process much easier. The best way to transport LEGO sets is to use secure containers, protect fragile builds with proper wrapping, and keep pieces sorted to prevent damage or loss.
You don’t need to worry about models breaking apart or missing bricks if you plan ahead. Disassembled sets stay safe in sealed bags, while completed builds benefit from careful wrapping and sturdy boxes. Choosing the right method depends on the size of your collection and how much time you want to spend rebuilding later.
By using simple strategies and the right materials, you can move your LEGO sets without stress. This guide will show you how to prepare, pack, and transport them so they arrive in the same condition they left.
Key Takeaways
Decide which sets are worth moving and how to handle them
Use the right packing methods for both loose pieces and built models
Protect each set during transport to make unpacking easier
Assessing Your LEGO Collection
Before you start packing, you need a clear picture of what you own, what you actually want to bring, and how to prepare each type of set. Taking time to plan now will save space, prevent damage, and make unpacking more manageable.
Inventory and Prioritize Sets
Begin by creating a written or digital list of your sets. Record the set number, name, and whether it is sealed, built, or disassembled. This step helps you track what you have and reduces the chance of losing items during the move.
Next, identify which sets are most valuable to you. Value can mean monetary worth, rarity, or personal importance. For example, a retired set may need more careful handling than a newer, replaceable one.
You can also group sets into categories:
Sealed in box
Opened but complete
Assembled display models
Loose bricks or bulk pieces
This organization makes it easier to assign packing methods. High-value sets may need extra padding or even custom containers, while common bulk pieces can be stored in sturdy bins.
Decide What to Transport
Not every LEGO set needs to move with you. Some may be duplicates, incomplete, or less important. Choosing what to leave behind reduces the number of boxes and lowers the risk of damage.
Ask yourself:
Do I still want this set in my collection?
Is it worth the space and effort to move?
Could I sell, donate, or store it elsewhere?
For example, moving an entire bulk collection across the country may be costly and unnecessary if you only build with certain sets. In that case, you might keep display models and rare sealed sets while selling or donating common bricks.
By narrowing down what you transport, you save time and simplify unpacking in your new home.
Prepare Sets for Moving
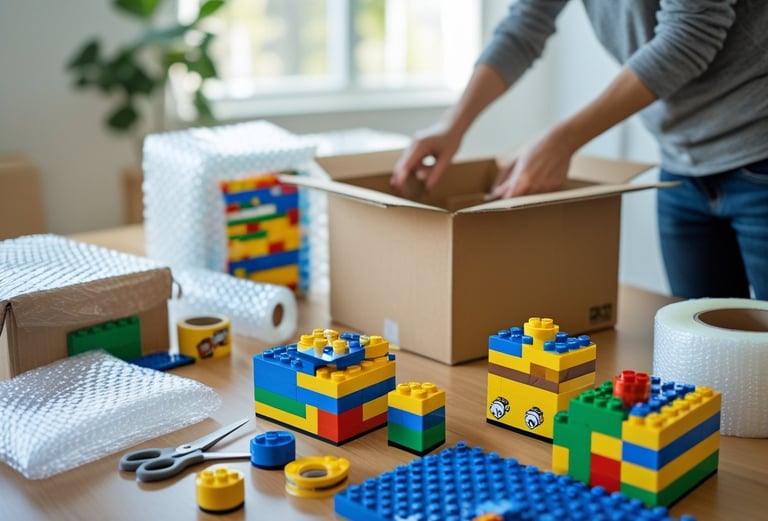
Once you decide what to bring, focus on proper preparation. Built models are fragile and often break apart during transport. To prevent this, you can either carefully disassemble them or wrap them in bubble wrap and place them in sturdy boxes.
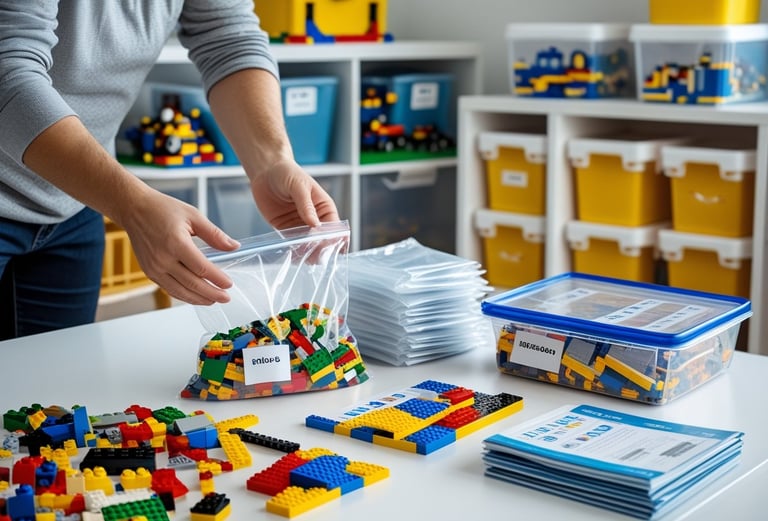
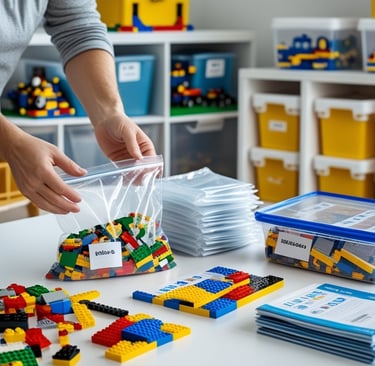
For disassembled sets, use resealable bags labeled with the set number and name. Place instructions in the same bag or box so rebuilding is easier later. If you still have the original packaging, storing pieces back in the box is a reliable option.
For sealed sets, keep them upright and avoid stacking heavy boxes on top. If you are transporting rare or collector sets, consider photographing their condition before packing. This documentation is useful in case of insurance claims.
Taking these steps ensures your LEGO arrives organized and protected, ready for display or rebuilding.
Packing Disassembled LEGO Sets
When moving loose LEGO bricks, you need to keep them protected, sorted, and easy to rebuild later. Careful organization, the right storage materials, and clear labeling make the process smoother and reduce the chance of losing important pieces.
Sorting and Organizing Pieces
Start by grouping your LEGO pieces in a way that makes sense for you. Many people sort by set, while others prefer sorting by color or piece type. Sorting before packing prevents frustration later when you want to rebuild.
If you have large collections, break them into smaller categories. For example:
By set: Keep all bricks from one set together
By type: Plates, bricks, slopes, tiles, etc.
By color: Useful for builders who mix sets frequently
Avoid tossing everything into one container. A little time spent on sorting now saves hours when rebuilding.
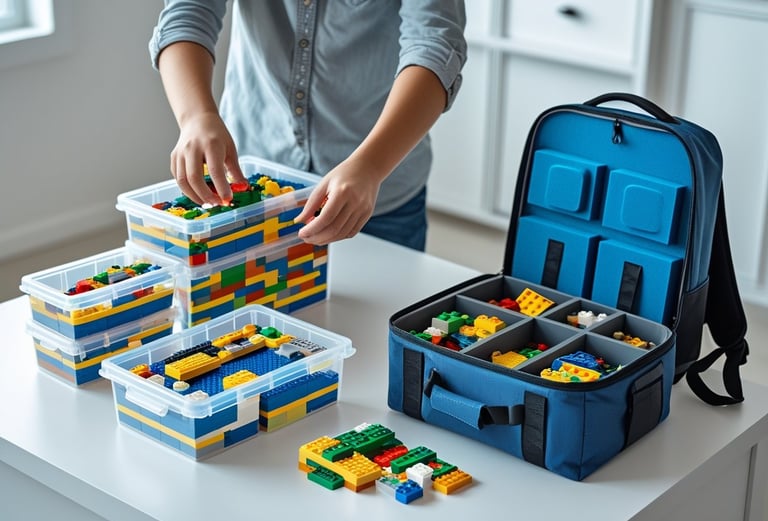
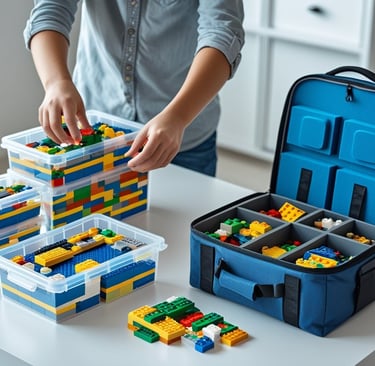
Using Sealable Bags and Containers
Once sorted, place pieces into resealable plastic bags. Choose bag sizes based on the number of pieces. Small bags work well for minifigures or unique parts, while larger bags hold bulk bricks.
After bagging, place the bags inside sturdy containers. Clear plastic bins work better than opaque boxes since you can see contents without opening them. Hard containers also protect against crushing during transport.
For extra protection, avoid overfilling bags. Too much pressure can cause bags to split. You can also wrap delicate or rare pieces in bubble wrap before bagging.
Labelling for Easy Reassembly
Label each bag or container so you know exactly what’s inside. Use permanent markers or adhesive labels that won’t peel off during the move.
If you sorted by set, write the set name and number on the bag. If you sorted by type or color, note that clearly. For example: “1x2 plates – red” or “Set 75257 Millennium Falcon – bag 3 of 5.”
Keep instruction manuals with their sets or place them in a separate folder. A simple table or checklist on paper can also help you track which bags belong to which set. This makes rebuilding faster and less confusing once you unpack.
Packing Assembled LEGO Sets
Moving fully built LEGO sets requires extra care since they are fragile and can break apart if not handled correctly. You need to prepare each build, secure delicate parts, and use proper wrapping to keep everything stable during transport.
Preparing Sets for Packing
Start by cleaning your LEGO builds. Dust and dirt can scratch bricks or make them harder to reassemble if pieces come loose. A soft brush, like a clean paintbrush, works well for removing dust without damaging the model.
Take photos of each set before packing. This helps if you need to rebuild sections that shift during the move. Store digital copies so you can zoom in on details later.
Remove instruction booklets and keep them with the set. Place them in a labeled plastic sleeve so they don’t get lost. If you don’t have the instructions, you can download PDFs from LEGO’s official website.
Check each model for weak spots. If a section feels loose, reinforce it by pressing bricks firmly together. For very large builds, consider partially disassembling areas that stick out or are too heavy.
Protecting Fragile Components
Some LEGO pieces are more likely to break off during a move. Antennas, sails, flags, and other thin parts should be removed before packing. Place them in small, sealable bags labeled with the set name.
Group fragile parts by type so you can find them quickly when rebuilding. For example:
Part Type Storage Method
Antennas/rods Small zip bag
Sails/cloth Flat plastic sleeve
Transparent parts Bubble wrap pouch
If your set includes stickers or custom elements, protect them with a layer of wax paper or tissue to prevent peeling or scratches.
Keep all removed parts in the same container as the main build. This prevents confusion and reduces the risk of losing small but important details.
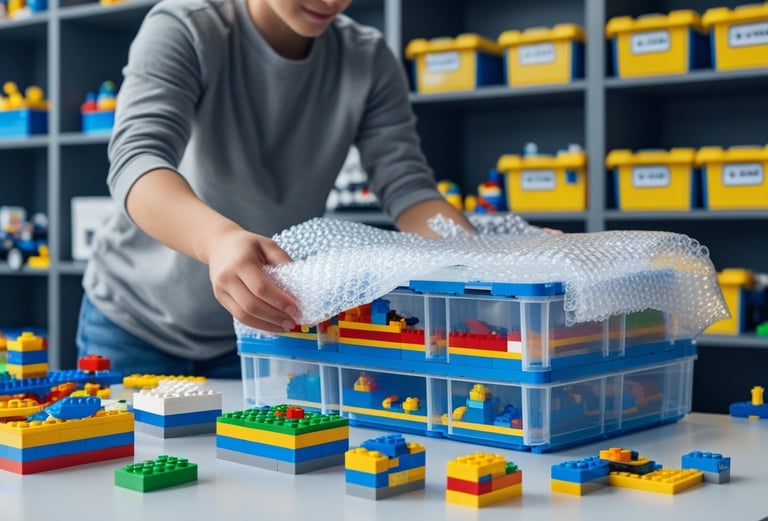
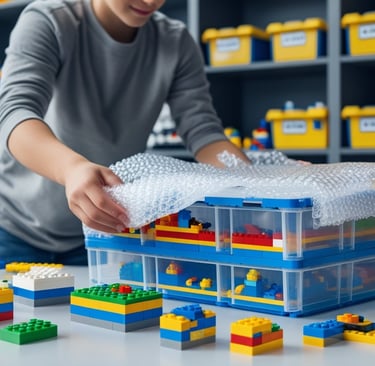
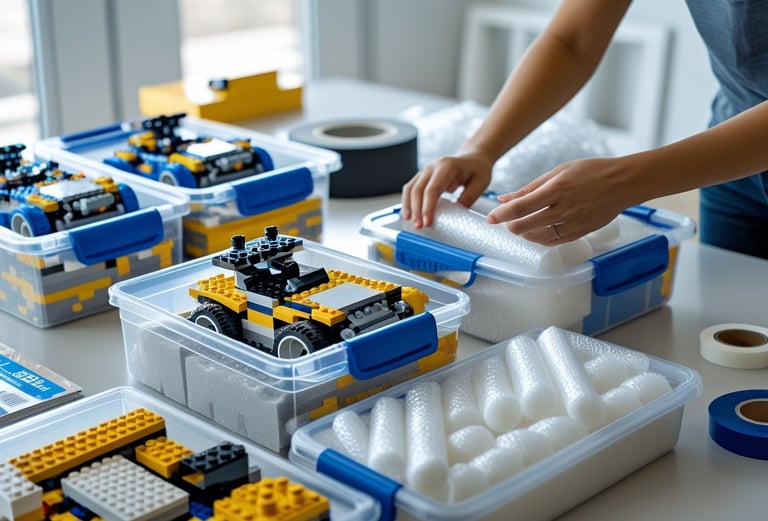
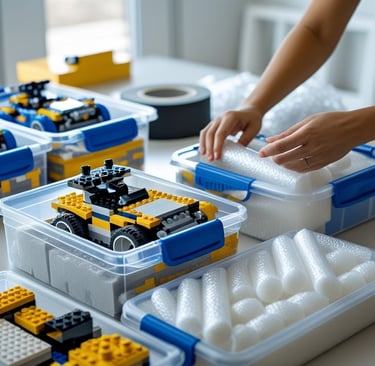
Wrapping and Cushioning Builds
Once the model is stable, wrap it in plastic film to hold bricks together. Stretch wrap works best because it clings tightly without leaving residue. Make sure the entire build is covered so no pieces can fall out.
After wrapping, use bubble wrap to cushion the set. Cover all sides and secure the wrap with tape, but avoid taping directly to LEGO bricks.
Choose a box or bin that fits the build closely. Too much empty space allows shifting, which can cause damage. Fill gaps with packing paper, bubble wrap, or foam peanuts until the set is snug.
Label the box clearly with the set name and mark it as Fragile. This ensures careful handling and makes unpacking easier.
Choosing the Right Packing Materials
The materials you use to pack LEGO sets affect how well they stay protected during transport. Strong boxes, soft cushioning, and clear labeling keep both loose bricks and completed builds safe and organized.
Selecting Sturdy Boxes
You should choose boxes that are rigid enough to hold weight without bending. Cardboard moving boxes work well, but avoid thin or worn ones that may collapse. Small to medium boxes are better than large ones because LEGO pieces are heavy when grouped together.
Plastic storage bins with snap-on lids are another good option. They resist crushing and protect against moisture. If you use bins, line the bottom with a soft layer of paper or fabric to prevent sliding.
Keep in mind that oversized boxes can make sets shift around. Using several smaller containers gives you more control and reduces the risk of damage.
Using Bubble Wrap and Packing Paper
Bubble wrap and packing paper help protect both assembled builds and loose pieces. Wrap completed models in several layers of bubble wrap to cushion fragile connections. For extra security, place each wrapped model inside a box with crumpled paper filling the gaps.
Loose LEGO bricks can be placed in resealable plastic bags before going into boxes. This prevents them from scattering and makes unpacking easier. Label each bag with the set number or theme to save time later.
Avoid using newspaper because the ink can transfer onto lighter-colored bricks. If you want a more eco-friendly option, use clean kraft paper or soft cloth.
Securing with Tape and Labels
Once you pack your boxes, seal them tightly with strong packing tape. Reinforce the bottom seams with at least two layers of tape so the box can handle the weight.
Label each box clearly with its contents. Use terms like “Loose Bricks – Red and Blue” or “Assembled Starship Model.” This makes unpacking faster and helps you know which boxes need extra care when moving.
If possible, mark fragile boxes with “Handle with Care” or “Do Not Stack.” This reduces the chance of heavy items being placed on top of your LEGO sets during transport.
Transporting LEGO Sets Safely
Moving LEGO sets requires attention to how they are carried, how they are handled during loading, and the conditions they are exposed to while in transit. Each factor plays a role in preventing damage, keeping pieces together, and ensuring your collection arrives in the same condition it left.
Personal vs Professional Transport
You can choose to move LEGO sets yourself or hire professionals. Each option has benefits and trade-offs.
When transporting sets personally, you keep full control. You can place fragile builds in your car, secure them with soft padding, and avoid stacking heavy items on top. This works best for rare or valuable sets where you want to reduce risk.
Professional movers can handle large collections more efficiently. However, you must clearly label boxes as fragile and explain how they should be handled. Not all movers are familiar with the delicate nature of LEGO builds, so communication is key.
A good approach is to combine both methods. Move your most valuable or sentimental sets yourself, and let movers handle bulk containers of loose bricks or disassembled sets. This balance reduces stress and limits the chance of breakage.
Handling During Loading and Unloading
The most common damage occurs when boxes are lifted, stacked, or shifted. Careful handling during these steps matters more than during steady transport.
Always lift containers from the bottom instead of the sides. This prevents boxes from collapsing or opening. If you use plastic bins, make sure lids are tightly secured with tape.
When loading into a vehicle, never place LEGO boxes under heavy furniture or appliances. Instead, stack them on top of lighter items or against flat surfaces. Keeping them upright reduces shifting during movement.
During unloading, open boxes slowly and check for loose parts before moving them again. Having a soft surface like a table or mat nearby helps if anything falls out. A short checklist can help:
Lift from the bottom
Keep boxes upright
Avoid stacking under heavy items
Open over a soft surface
Temperature and Environmental Considerations
LEGO bricks are made of ABS plastic, which can warp or weaken under extreme conditions. You should avoid leaving sets in hot cars, damp basements, or areas with direct sunlight.
High heat may cause bricks to soften slightly, making them harder to keep connected. On the other hand, very cold conditions can make the plastic brittle and more likely to crack under stress.
Moisture is another concern. Humidity or leaks can damage instruction booklets, warp boxes, and cause dust or mold to build up on pieces. Store sets in sealed containers to protect them from water exposure.
If you are moving long distances, plan for climate control. Transport LEGO in the main cabin of your car rather than the trunk when possible. For professional moves, ask about climate-controlled trucks if your collection is large or valuable.
Unpacking and Reassembling LEGO Sets
When you arrive at your new home, the way you unpack and rebuild your LEGO sets affects how quickly and smoothly you can enjoy them again. Careful setup, visual references, and piece tracking make the process easier and reduce frustration.
Unpacking in an Organized Space
Choose a clean, flat surface with good lighting before opening any boxes. A large table or desk works best, as it gives you room to spread out pieces without losing track of them. Avoid areas with heavy foot traffic to prevent accidents.
Keep storage containers, bags, or trays nearby to sort parts as you unpack. Sorting by color, shape, or set number keeps pieces from mixing together. If you labeled your boxes during packing, open one set at a time to stay focused.
Use resealable bags or small bins for loose parts that don’t belong to a specific set. Keeping them separate prevents confusion later. This system also makes it easier to pause and resume building without starting over.
Using Photos for Reference
If you took photos of your sets before disassembly, use them as a guide. Images of completed models help you remember details that instructions may not show clearly, such as sticker placement or custom modifications.
Place the photos on a tablet, phone, or printed sheet near your workspace. This allows you to compare progress as you rebuild. Even a few pictures of different angles can save time.
For sets missing instructions, photos are especially useful. You can often identify where certain unique pieces belong by looking closely at the original build. This reduces guesswork and helps you restore the model’s original look.
Checking for Missing Pieces
As you rebuild, keep track of any pieces that seem to be missing. Lay out the parts in small groups so gaps are easier to spot. If you sorted during unpacking, this process will take less time.
Double-check bags and boxes, since small bricks often hide in corners or under packing material. A checklist of each set’s inventory, available from LEGO’s website, can help confirm what’s missing.
If you can’t find a piece, set the model aside and continue with another section. Later, you can order replacements directly from LEGO or look through your extra parts collection to fill the gap.